Test web server for VirtualBox

It is very important to have a development or test environment for whatever you are working on. It does not matter if it is your home made project, your personal website, your school project or your work stuff. You should always follow good practice and have a test environment (with backup) for all changes and experiments before going into production. I do the same. I have a few websites and servers, I also test a lot of stuff like custom scripts, CMS, frameworks and engines. I also try to code myself or try to modify someone else’s open source/free code to achieve my goals. BTW, copy and paste from stack overflow is past, now you should ask ChatGPT for mutated AI generated code you can modify and sell ;) . I do all of this in a test environment that simulates production. The test machine should look exactly the same as the production machine, same configuration, same system and same package version. Thanks to this, you can be sure that no additional bugs will show up after you run the test and push the latest version live.

VM Test Web Server

To test things, I use a Virtual Box machine running Linux. In my case Debian, because at the moment all my servers are running Debian 12. Of course I do not share my configuration, instead of that I created a minimal Debian 12 installation with simple configuration similar to what you get when you buy some cheap VPS. I added Nginx with 3 test sites running PHP and MariaDB. You can have a look at the configuration of the system and each installed application to learn how to configure, manage and maintain your own web server.

Now you can confidently upload your scripts and test different sites and configurations, without wasting time building each environment from scratch. Verify that the default settings I have implemented suit your needs, and upload your scripts for testing by modifying the configuration to suit your needs and requirements.

Using this solution you can simulate working with real Virtual Private Server. Before you buy one, learn how to use it!

Test web server for VirtualBox

Here are some technical details about the machine itself:

  • System: Debian 12
  • Web server: Nginx (mainline)
  • PHP: 8.2
  • Database: MariaDB 11.1
  • Access: SSH
  • Firewall: UFW
  • SSHD protection: Fail2Ban
  • NAT network with port forwarding (8022 SSH; 80 Website 1; 8088 Website 2; 8089 Website 3)
  • 1 CPU and 2048 MB RAM (you can adjust it in settings)

Remember my article about Your first VPS server? These are the steps I followed to configure that machine. So to recap:

  1. Installing the system
  2. Adding and configuring users
  3. Configure SSH server
  4. Firewall and fail2ban configuration
  5. Enable automatic updates
  6. Installing and configuring the Nginx web server
  7. Installing and configuring the PHP and MariaDB

Now you, as the end user, download the machine, import it into VirtualBox and run it (yeah, who would trust you men).

You can access the machine from the VirtualBox interface or leave it running in the background and log in using SSH (like for the real VPS).

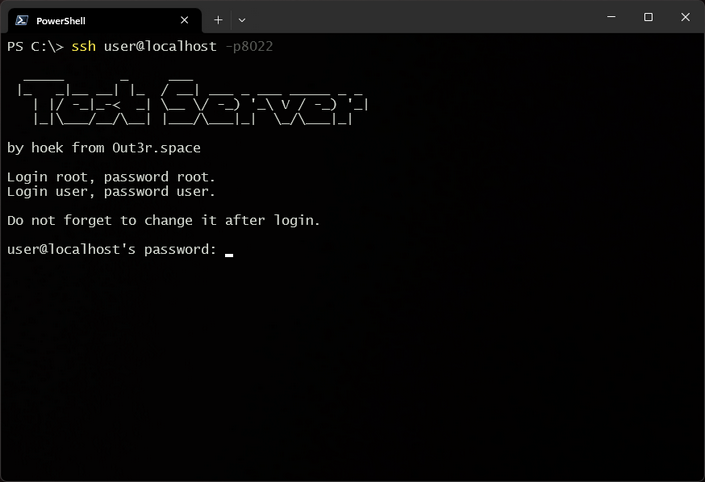
Connection command from PowerShell or Bash:

1
ssh user@localhost -p8022

Credentials for the machine are:

1
2
Login: root; Password: root
Login: user; Password: user

Please change it after logging in.

Root login via remote access is forbidden, you should always login as a standard user and use the sudo command for administrative operations.

The MariaDB database is protected by root. All you need to do to access the database is to use the sudo mysql command.

Once the machine is up and running, you can also open your web browser and type http://localhost/ (port 80). Thanks to port forwarding, you will be automatically redirected to the website hosted by the virtual machine. If you add port 8088 (http://localhost:8088/) and 8089 (http://localhost:8089/) to the address, you will see two other websites configured on this server. The websites are just standard html landing pages for Nginx with modified content to display the website name and additionally Website_1 has a link to an info.php file with content <?php phpinfo(); ?> to help you check the installed PHP version and enabled PHP modules.

If you have already configured something on your computer that is running as a local host on the same ports, it may cause a collision. You should then change the ports in Nginx and in Virtual Box for port forwarding.

Here is nginx.conf content with additional comments:

1
2
3
4
5
6
7
8
9
10
11
12
13
14
15
16
17
18
19
20
21
22
23
24
25
26
27
28
29
30
31
32
33
34
35
36
37
38
39
40
41
42
43
44
45
46
47
48
49
50
51
52
53
54
55
56
57
58
59
60
61
62
63
64
65
66
67
68
69
70
71
# Define the user and number of worker processes for Nginx
user nginx;
worker_processes auto;
#Specify the error log file and log level
error_log /var/log/nginx/error.log notice;
# Specify the path for the process ID (PID) file
pid /var/run/nginx.pid;
# Configure event handling, including the maximum number of connections
events {
worker_connections 1024;
}

http {
# Include MIME types configuration
include /etc/nginx/mime.types;
# Set the default MIME type for files that don't have a specific type
default_type application/octet-stream;
# Define the log format for access logs
log_format main '$remote_addr - $remote_user [$time_local] "$request" '
'$status $body_bytes_sent "$http_referer" '
'"$http_user_agent" "$http_x_forwarded_for"';
# Specify the location and format for access logs
access_log /var/log/nginx/access.log main;

# Enable performance optimizations
# Enable the use of the sendfile system call for serving static files efficiently
sendfile on;
# Enable the TCP NOPUSH feature to optimize data transmission over the network
tcp_nopush on;
# Enable TCP_NODELAY to reduce latency by sending small packets immediately
tcp_nodelay on;
# Set the keep-alive timeout for client connections to 5 seconds
keepalive_timeout 5;
# Set the maximum size of the MIME types hash table to 2048
types_hash_max_size 2048;
# Disable server token disclosure in HTTP response headers
server_tokens off;
# Set the timeout for reading the client request body to 30 seconds
client_body_timeout 30;
# Set the timeout for reading client request headers to 40 seconds
client_header_timeout 40;
# Limit the maximum size of the client request body to 200 megabytes
client_max_body_size 200M;
# Set the timeout for sending a response to the client to 30 seconds
send_timeout 30;
# Allocate buffers for handling large client request headers.
large_client_header_buffers 2 4k;

# Configure gzip compression for responses
# Enable gzip compression for HTTP responses.
gzip on;
# Disable gzip compression for outdated MSIE 6 browsers
gzip_disable "msie6";
# Vary the gzip compression based on the Accept-Encoding header
gzip_vary on;
# Specify the minimum length of a response to be compressed (256 bytes)
gzip_min_length 256;
# Enable gzip compression for responses proxied from backend servers
gzip_proxied any;
# Set the compression level (6 is a reasonable compromise between speed and compression ratio)
gzip_comp_level 6;
# Allocate buffers for gzip compression
gzip_buffers 16 8k;
# Specify the minimum HTTP version for which gzip compression should be used (HTTP/1.1).
gzip_http_version 1.1;
# Specify the MIME types for which gzip compression should be applied

gzip_types text/plain text/css text/js application/ttf application/javascript application/json application/x-javascript text/xml application/xml application/xml+rss text/javascript application/vnd.ms-fontobject application/x-font-ttf font/opentype image/svg+xml image/x-icon font/ttf;
# Include additional configuration files from /etc/nginx/conf.d/
include /etc/nginx/conf.d/*.conf;
}

Website_1 config with comments:

1
2
3
4
5
6
7
8
9
10
11
12
13
14
15
16
17
18
19
20
21
22
23
24
25
26
27
28
29
30
31
32
33
34
35
36
37
38
39
40
41
42
43
44
45
46
47
48
49
50
51
52
53
54
55
56
57
58
59
60
61
62
63
64
65
66
server {
# Define the port the server will listen on (port 80 - HTTP)
listen 80;
# Define the server name (localhost - here, treated as the default name)
# On the production server it is your domain name eg. example.com
server_name localhost;
# Specify the directory where website files are located
root /var/www/website_1;
# Specify the index file priorities (index.html and index.php)
index index.html index.php;
# Define the access log file and format
access_log /var/log/nginx/website_1_access.log combined;
# Define the error log file and log level
error_log /var/log/nginx/website_1_error.log error;
# Handle php requests
location ~ \.php$ {
# Check if a PHP file exists; if not, return a 404 error
try_files $uri =404;
# Include the PHP-FPM configuration
include /etc/nginx/fastcgi_params;
# Pass requests to PHP-FPM through a Unix socket
fastcgi_pass unix:/var/run/php/php8.2-fpm.sock;
# Specify the default index file for FastCGI requests as index.php
fastcgi_index index.php;
# Set the SCRIPT_FILENAME parameter to the requested PHP file's path
fastcgi_param SCRIPT_FILENAME $document_root$fastcgi_script_name;
# Split the path info for PHP files, capturing the file and additional path info
fastcgi_split_path_info ^(.+\.php)(/.+)$;
}
# Deny access to Apache configuration files (.htaccess)
location ~ /\.ht {
deny all;
}
# Set a long expiration time for static files
location ~* \.(jpg|jpeg|png|gif|ico|woff2)$ {
expires 365d;
}
# Set a medium expiration time for other static files
location ~* \.(pdf|css|js|swf|ttf)$ {
expires 30d;
}
# Set a medium expiration time for other static files
location = /robots.txt {
log_not_found off;
access_log off;
}
# Turn off access logging for favicon.ico
location = /favicon.ico {
log_not_found off;
access_log off;
}
# HSTS - protect from downgrade attacks
add_header Strict-Transport-Security "max-age=63072000; includeSubDomains; preload";
# X-XSS-Protection - Protect against XSS attacks
add_header x-xss-protection "1; mode=block";
# X-Content-Type-Options - Prevent content type sniffing
add_header X-Content-Type-Options "nosniff";
# X-Frame-Options - Protect against Clickjacking attacks
add_header x-frame-options "SAMEORIGIN";
# Referrer-Policy header - Control referrer information
add_header Referrer-Policy "strict-origin";
# Permissions-Policy - Define browser feature access policy
add_header Permissions-Policy "geolocation=(),midi=(),sync-xhr=(),microphone=(),camera=(),magnetometer=(),gyroscope=(),fullscreen=(self),payment=()";
# Content-Security-Policy - XSS protection policy
add_header Content-Security-Policy "script-src 'self' 'unsafe-inline'";
}

Website_2 and Website_3 configs have only changed the website root path and log path.

1
2
3
4
5
6
7
8
root   /var/www/website_2;
root /var/www/website_3;

access_log /var/log/nginx/website_2_access.log combined;
error_log /var/log/nginx/website_2_error.log error;

access_log /var/log/nginx/website_3_access.log combined;
error_log /var/log/nginx/website_3_error.log error;

Do not forget to take snapshots of your virtual machine. If something goes wrong or gets out of control, you can simply import the previous configuration and start again from the last good position.

I hope you find this machine useful. Have fun learning and testing your own scripts and websites.

PS: This machine is also a first step in preparing an Udemy course about creating your first VPS server and the possibilities it offers. I don’t know how long it will take and what the end result will be, but I decided to try something new, to learn some new tools and platforms. Maybe sharing my knowledge in this way will not only make me happy, but also bring in a small steady income. If you have any ideas or suggestions as to what you would like to see in such a course, please feel free to let me know.