Uncomplicated Firewall is a front-end to iptables. Its main goal is to make managing your firewall simple and to provide an easy-to-use interface.

Start
To install just type:
1 | sudo apt install ufw |
Check status, in general after installation it is inactive, but when you enable it you can find output similar to:
1 | sudo ufw status |
Example of output of command:
1 | Status: active |
If you want to use ipv6 you need to turn this option in configuration file:
1 | sudo nano /etc/default/ufw |
1 | IPV6=yes |
To restart your firewall use commands:
1 | sudo ufw disable |
Defaults
Define some default rules for allowing and denying connections. UFW’s defaults are to deny all incoming connections and allow all outgoing connections.
Enable default incoming rules:
1 | sudo ufw default deny incoming |
Enable default outgoing rules:
1 | sudo ufw default allow outgoing |
Edit conf file to auto start of UFW service with system boot:
1 | sudo nano /etc/ufw/ufw.conf |
1 | ENABLED=yes |
Allow Connections
The syntax is pretty simple. UFW comes with some defaults for common uses. Our SSH command above is one example.
Enable SSH on default port
1 | sudo ufw allow ssh |
It’s basically just shorthand for:
1 | sudo ufw allow 22/tcp |
If our SSH server is running on port 1234, we could enable connections with the following command:
1 | sudo ufw allow 2222/tcp |
Other Connections
WWW
1 | sudo ufw allow www |
or
1 | sudo ufw allow 80/tcp |
FTP
1 | sudo ufw allow ftp |
or
1 | sudo ufw allow 21/tcp |
Port Ranges
Allow port ranges
1 | sudo ufw allow 100:300/tcp |
Same for UDP connections:
1 | sudo ufw allow 100:300/udp |
Advanced rules
To allow connections from an IP address:
1 | sudo ufw allow from 192.168.0.100 |
To allow connections from a specific subnet:
1 | sudo ufw allow from 123.45.67.89/24 |
To allow a specific IP address/port combination:
1 | sudo ufw allow from 123.45.67.89 to any port 22 proto tcp |
Denying connections
It’s not very common (and even not recomennded) to allow all incoming traffic and then deny something, but it’s good to know how to deny rules.
1 | sudo ufw deny 80/tcp |
Deleting rules
It’s simple, just add delete before the rule implementation.
If you no longer wished to allow HTTP traffic, run:
1 | sudo ufw delete allow www |
or
1 | sudo ufw delete allow 80/tcp |
You can also list rules and delete them by numbers. List rules and number them:
1 | sudo ufw status numbered |
Then delete rule with number you want:
1 | sudo ufw delete [number] |
Turn it on
1 | sudo ufw enable |
Check status:
1 | sudo ufw status |
or for more details
1 | sudo ufw status verbose |
Turn it off:
1 | sudo ufw disable |
Reset firewall:
1 | sudo ufw reset |
Logging
You can enable logging with the command:
1 | sudo ufw logging on |
Log levels can be set by running sudo ufw logging low|medium|high, selecting either low, medium, or high from the list. The default setting is low.
Example of log file:
1 | May 11 15:10:08 <hostname> kernel: [UFW BLOCK] IN=eth0 OUT= MAC=00:00:00:00:00:00:00:00:00:00:00:00:00:00 SRC=123.45.67.89 DST=987.65.43.21 LEN=40 TOS=0x00 PREC=0x00 TTL=249 ID=8475 PROTO=TCP SPT=48247 DPT=22 WINDOW=1024 RES=0x00 SYN URGP=0 |
- [UFW BLOCK]: This location is where the description of the logged event will be located. In this instance, it blocked a connection.
- IN: If this contains a value, then the event was incoming
- OUT: If this contain a value, then the event was outgoing
- MAC: A combination of the destination and source MAC addresses
- SRC: The IP of the packet source
- DST: The IP of the packet destination
- LEN: Packet length
- TTL: The packet TTL, or time to live. How long it will bounce between routers until it expires, if no destination is found.
- PROTO: The packet’s protocol
- SPT: The source port of the package
- DPT: The destination port of the package
- WINDOW: The size of the packet the sender can receive
- SYN URGP: Indicated if a three-way handshake is required.
0means it is not.
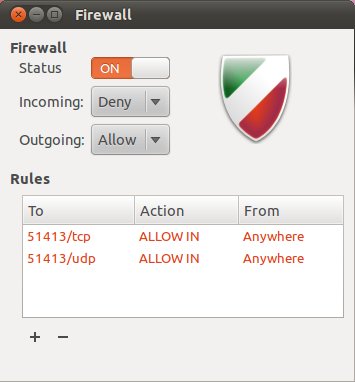
Graphical interface
You can also install graphical interface for UFW:
1 | sudo apt install gufw |